
Guess who made another Itodenwa video this year
I said on January 8th that I would not be making anything for this year’s itodenwa posting festival. That was because I just finished a video the weekend prior and didn’t have the energy to jump straight into another project.
That was the truth, I didn’t plan on doing anything. But then January 10th came and went, and a whole… 2 videos were posted.
It made me a bit sad, and I decided that making a little something was better than not making anything, so I decided to quickly do a video over the weekend.
Ideation
There are a few bgms for which I already have a complete scenario of what I’d like to make using Itodenwa. Even though I started working on last year’s entry very late, I was already thinking about My Skaterboard Will Go On as a BGM candidate at least 6 months prior. At any point in time, I have multiple ideas, a lot of which are too ambitious and would require me to not do anything else for a while.
All of that to say, this year’s video was nothing like that, I just like the song a lot. A Spoonful of Curse is one of my favourites from r-906. I looked through my playlist for a moment and picked it on a whim. I imagined a few sentence chops in my head and it seemed to flow well.
It wasn’t until I was deeper in the audio-making phase that I realized the ironic subtext of using Itodenwa for a song that says “don’t pretend she never existed”. When I did, I decided to add those custom lyrics right before the refrain:
My numb hands point to the answer
Ah! I’ve realized
I’ll come see you nowWhen the date changes
Taking a spoonful of that magic charmI will be forgotten, won’t I?
This also represents my feelings toward Itodenwa in general, the source has been having less and less videos each posting festival, and the occurences are also very rare outside of the designated date.
It was also at that moment that I decided to put a bit more effort into this video, but just a bit, so I had the idea to make the video bait and switch and start as just a Reaper recording to make it look like an unfinished video.
Making the audio
The first half of the video is a bit jokey and only has the most barebones sentencing elements. Once the jinriki lyrics start, the cover becomes a bit more complete, but was is less work than you might think.
I’ve completely ripped the drum tracks from another project, so I did not have to spend time figuring out a good FX-chain to make them sound decent.
I did the same for the syllables, itodenwa doesn’t have a lot of them, so if you want to do more elaborate jinriki, you’re almost obligated to use the hard-stretched vowels that Zetsubou provided in his pack, and stitch those to whichever consonant you can find. However, that tedious matching job was already done in that same previous project, so I just had it open on another tab and took syllables from there.
I should look more deeply into Reaper scripting, because I feel like it wouldn’t be too hard to “register” some syllables, and then place them on a reaper track à la UTAU.
I followed the usual vocal-thickening tutorial I always use to give the voice a bit more stereo depth. And once again, I ripped the vocal-processing chain from another project.
Some visual stuff
I will now proceed to describe my ENTIRE visual process for this video. It will be easy because I only made one scene.
The invasive grain at the start is pretty easy to make in Fusion.
The grain node has a mapping curve that allows you to control its strength based on luminance, so with this trapezoid-like-curve, you can ansure that full the transition from black to white is grainy, but not full black/white. This can then be used as a luminance matte on a background node to give it the color I want.
As a side note, I quickly remembered that grain is expensive as hell to render, I don’t really know why, but even my new PC can’t get just this to run at 30fps in full resolution, it might be interesting to look up why it’s so intensive compared to white noise.
The more interesting part, obviously, is the next scene. I’ve loved this shot in the original MV and have been thinking about recreating it for a while, so now was a good opportunity.
It wasn’t actually that many nodes. This was done in an afternoon after all.
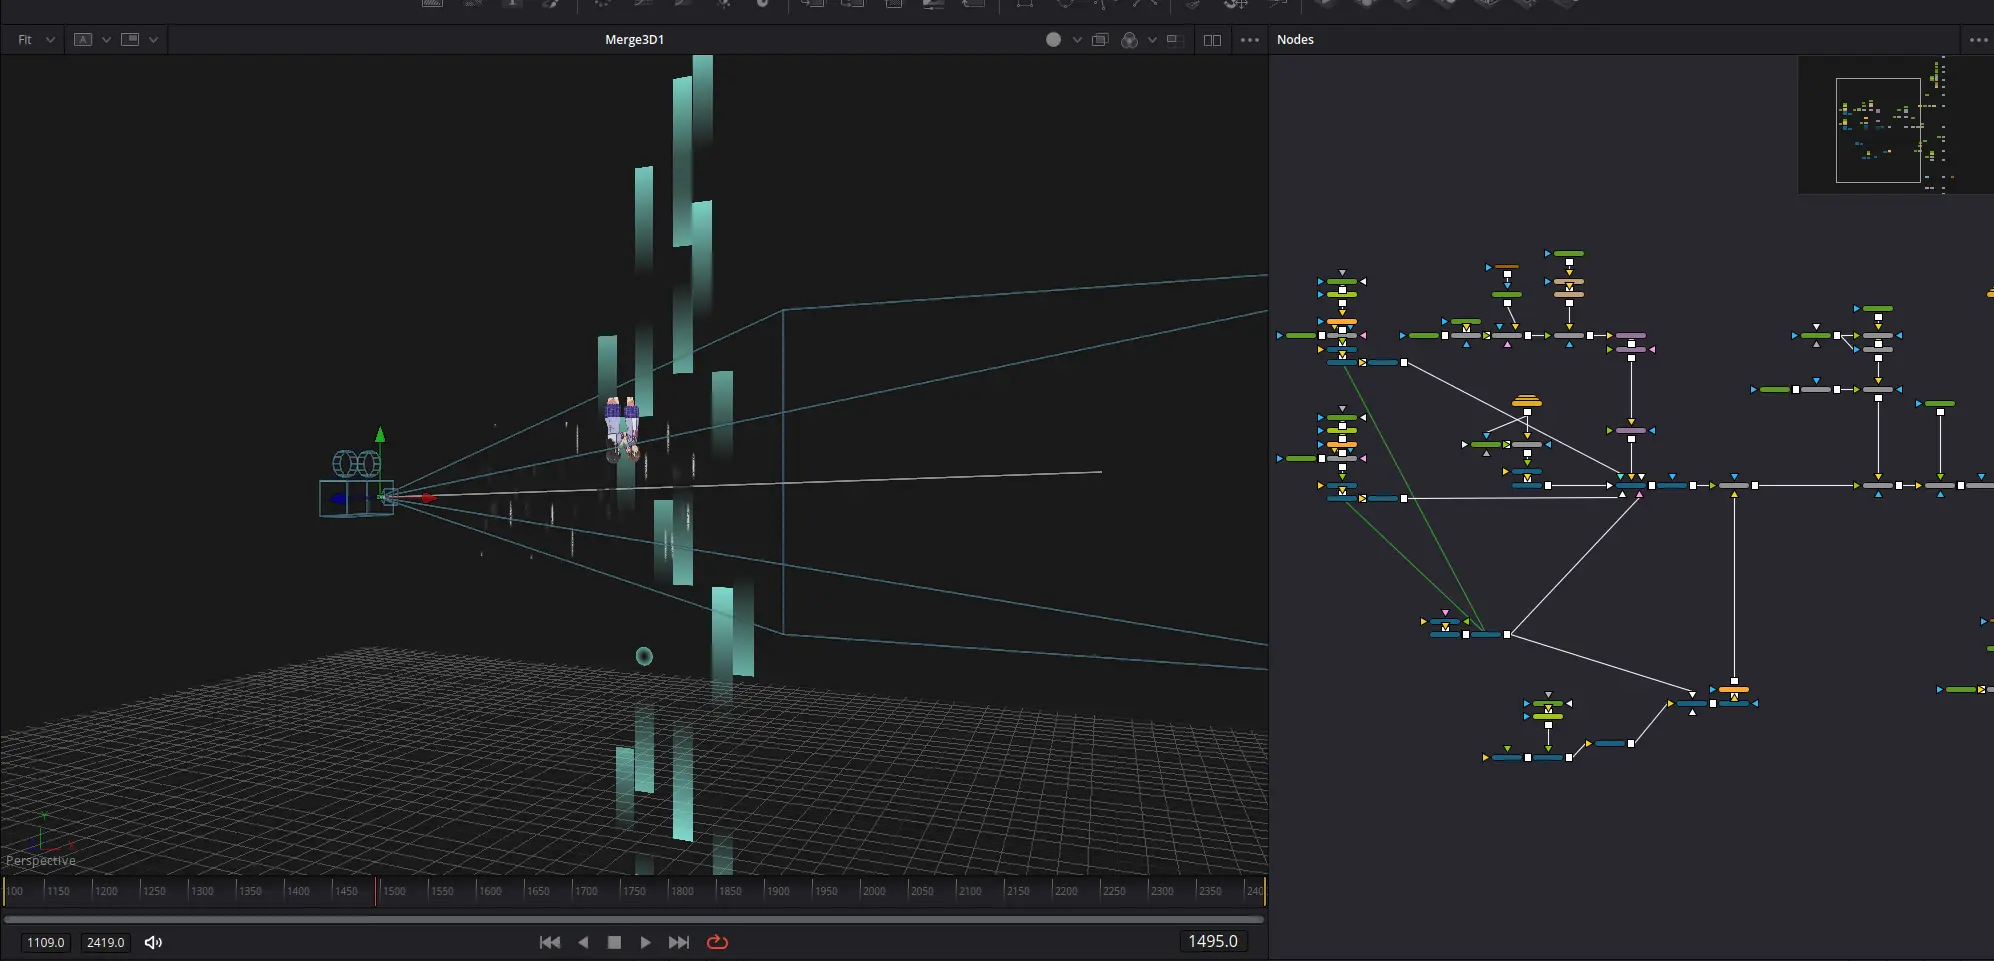
First things first, those extra particle overlays are actually part of the 3d scene as a plane.
The reason they are not just added after the 3d renderer is because I realized the camera shake should also affect them.
However, I did not want to add extra particles in 3d space, so instead, I made a linked copy of the transform node controlling the camera position (think of a null if you’re from AE), and attached it to the noise overlay. The camera shake is done on another Transform3d node, so I was able to parent the planes to the camera movement while not shaking them (otherwise, they would’ve looked static from the camera’s POV).
One thing I did not try to imitate was the text flying around like a thread in the original PV.
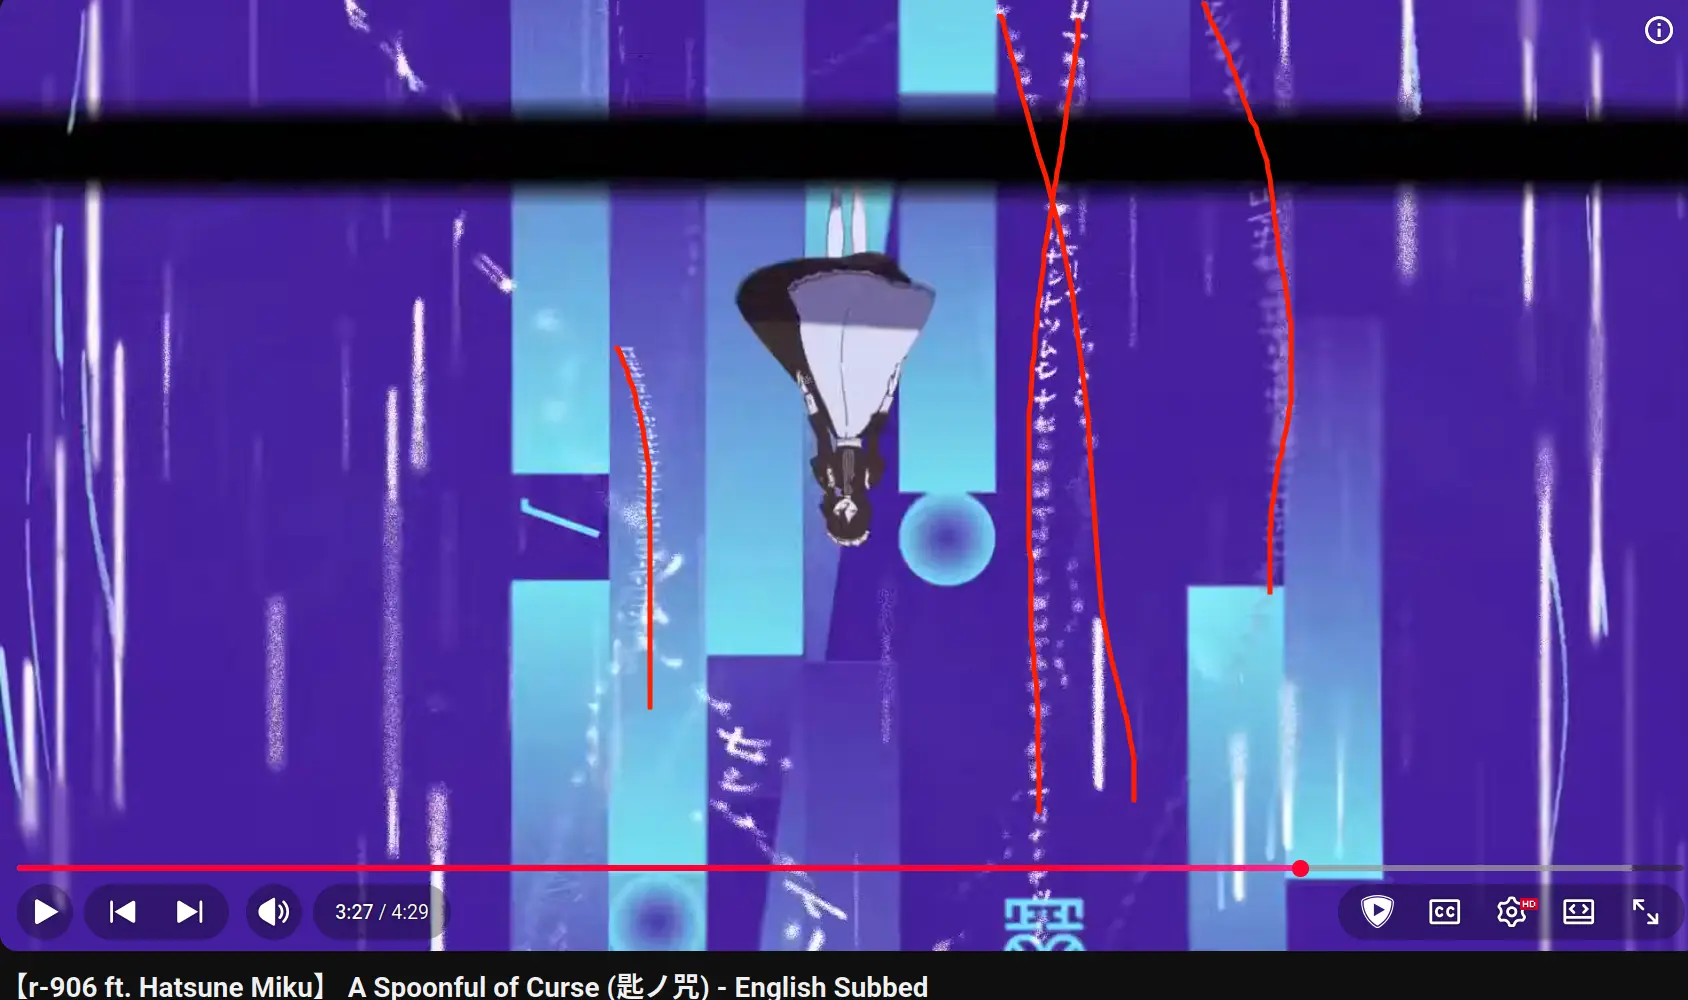
Did you know that this song and its PV are awesome? Really, check it out.
Instead, I just made some white strings using a Ribbon3d node, then distorted it with Displace3d.
I rendered this element in isolation (but still linked the same camera) so that I could blur the render and add it to the background of the main 3d render.
I’m saying “render” a lot here, and I’m doing it on purpose, I hope you can see how exciting it is that you can render a 3d scene within your node flow, AND that you can share a camera between 3d scenes just by linking it to a merge3d node. It’s super nice to have such an easy and intuitive way to handle “3d passes”.
Now let me talk about particle randomization for a moment.
I already mentioned this in my Tokyo Shandy Rendez-vous article, but particle emitters in fusion don’t just let you randomly sample from a set of frames.
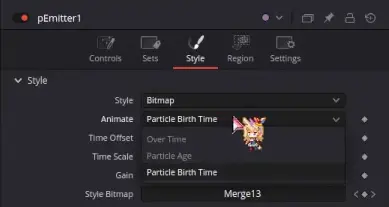
Basically, if you want particle randomness, you have to randomize them over time, and use the “particle birth time” option.
Thankfully, this is very easy to do with simple expressions, an if condition on a random number generator is all you need to randomly flip a value every frame.
There are 6 sources of randomness in this node setup.
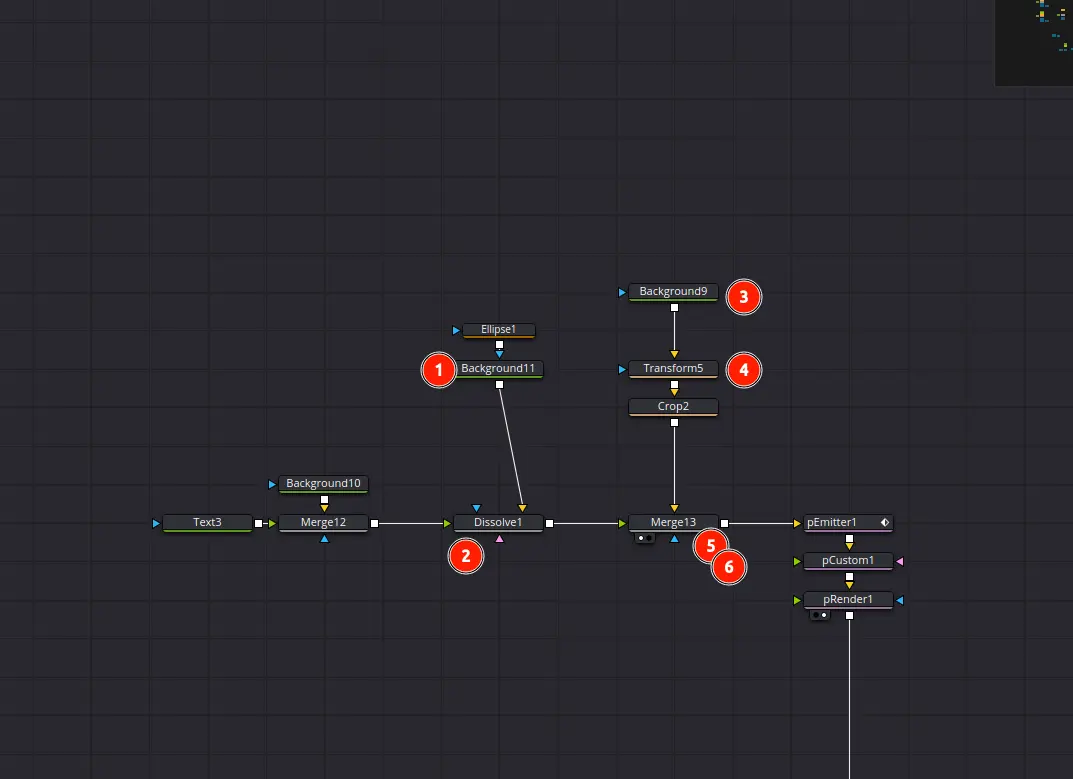
- The circle element has randomized intensity;
- This dissolve node switches either between the circle element or the 糸 text element;
- This is a gradient that goes from bright to transparent, the intensity is randomized too;
- Randomizes whether to flip the gradient vertically;
- Randomizes whether the circle/text element appears above or below the gradient;
- Randomizes whether the circle/text element appears at all.
I also had to pull some tricks to get the particles to behave the way I wanted.
With particle emitters alone, you can’t really set a precise distance between each particle horizontally, so they end up overlapping. What I had to do was to add a pCustom node, it’s a node that lets you do math on many properties of each particle. Because I have some very basic experience with shader programming, I’m somewhat used to this kind of parallel processing. So to briefly explain what I’m doing:
- Each particle is assigned a position between -1 to 1;
- This position is multiplied by a variable (let’s say 6 for example, so now we have a range from -6 to 6);
- Each position is rounded up, so all random positions are evenly separated;
- This position is divided by another variable until each particle sprite touches its neighboor.
PS: I’m forced to round up. I don’t know why I have to round up. it feels like Fusion expressions don’t have a Floor function in 18.6.6 and it’s driving me crazy.
And with this, we have evenly-separated particles!
Conclusion
That’s it. I don’t have much else to say, I made the video, I tried a few things in terms of visuals, and now it’s done. There are a few mistakes I made, such as the black sweeping bar repeating too frequently for my taste, or the fact that I really should have spent the extra time to figure out the string-like text, but it’s alright.
I’m also writing this article in an easygoing mood. It’s almost 2AM, I have work tomorrow so I didn’t put too much work into writing this either.
Just a spoonful of effort.